
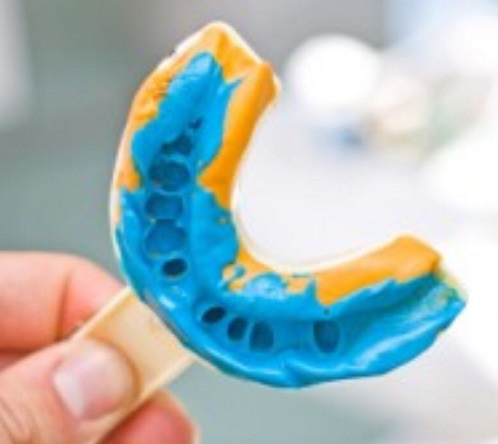
Tips for impression taking
1. In addition to meeting the requirements of general model making, care should also be taken to avoid the use of rubber gloves during operation, because talc and rubber gloves will affect the polymerization of silicone rubber impression materials.
2. It should be kneaded between the fingers, avoid using the palm, and cover the lid immediately after use. The lid cannot be interchanged.
3. Strictly follow the proportions required by the manual.
4. Strictly pay attention to the aseptic operation. Some silicone rubber materials release hydrogen on the surface after polymerization. After removing the impression, it needs to be placed for 20 to 30 minutes before filling the model. Otherwise, honeycomb bubbles will be generated on the surface of the model.
5. Sterilize impressions with dipping solution only. 2% glutaraldehyde is recommended. Please make sure that the disinfectant used is suitable for polyaddition silicone rubber.
Dispenser gun usage method
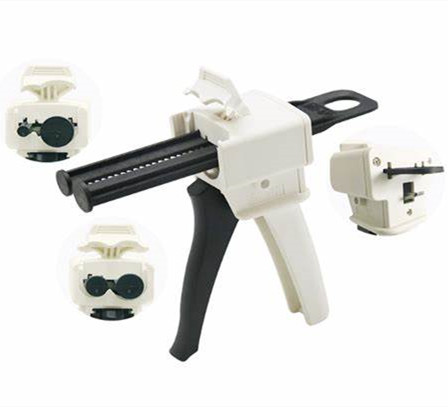
Instructions for 50ml dental impression gun products:
1. Open the tail switch of the 50ml dispensing gun to push it up, and then pull the rack to reach the maximum.
2. In order to mix dental impression materials, open the cap of the 50ml dual cartridge filled with impression material, then put on the relevant mixing tip and rotary it.
3. After opening the block on the top of dispensing dental impression gun, put the cartridge into the dispensing gun, then lock it.
4. Prepare the lacunar impression tray for the material. Pull the handle to squeeze impression materials steadily and symmetrically into the dental tray. And the amount of impression materials needs to cover operating teeth and near.
5. Take together the inter-oral tip with the mixing tip, and put the inter-oral tip into the gingival through
and cover the around of the whole teeth. Put the tray filling with the impression materials on the teeth, and then take out the tray after the impression materials are cured. At last, the whole procedure is completed.
6. Remove the cartridge, then repeat the above operation.
7. When choosing the dental impression mixing tips, it is much better color-coded, here is a reference of different types of dental impression mixing tips applied in dentistry: https://www.dentallabshop.com/types-of-dental-mixing-tips/
After the impression taking, the die stone model made in the laboratory is the next step of mold production. A powerful and high-loading dental vibrator is to make free-bubble die stone liquid materials for the molds.
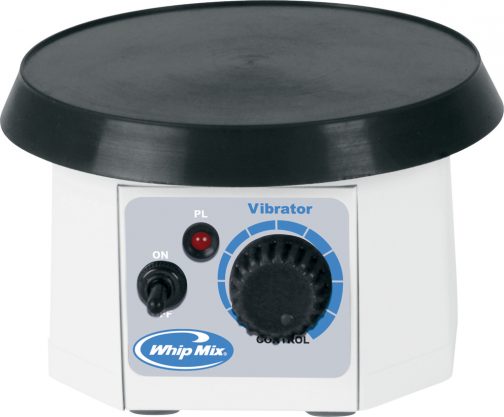
Impression taking and dental vibrator equipment are the following steps to produce dentures for clients.